Tuesday, May 26, 2009

Instructions for my white chocolate wrap!


I was asked several times if I could post instructions for this design, so here they are!
I am going to give you instructions for a normal wrap and then explain adjustments for the white wedding wrap.. Bake and frost your cake as normal and then set aside (I chill mine). Cut strip of acetate paper to the height you want and make sure it is long enough to go around the cake with a little overlap. Melt your chocolate (guittard or other high quality chocolate) slowly and stir to make sure it is melted completely. Then pour and spread over strip of acetate. You don't want it so thick that it is goopy but you don't want to see through to the acetate either. It doesn't matter if it goes over the edges. Before it starts to set completely carefully pick up top two corners. I let the middle of the acetate strip set on the cake board right up next to the cake and then wrap one side around and then the other. Don't smooth the sides as this will make your wrap wavy. Let set up in fridge and then gently pull the acetate away from the chocolate. To do the layered look I do one normal wrap around the cake. Once that is set I cut pieces of acetate in the shape of different sized peaks. I repeat the normal process with the peak shaped pieces of acetate, make sure to place them randomly in different sizes. Also make sure they have enough time to set up or they don't look smooth when you pull the acetate away. I hope that made sense. Let me know if you have any questions.
Tuesday, May 19, 2009

Groom's Cake


Here is a picture of the groom's cake I mentioned in the chocolate wrap post. It is suppose to be an abstract representation of mountains. The couple's first date was out hiking. The fondant figures were such a pain on this cake but I think they turned out cute. TFL!

White Chocolate Wrap


This is my all time favorite chocolate wrap! I love the way it turned out. With that said- it took forever! Each peak was done separately and then allowed to dry before doing the next. The strawberries took a while too but the effort was definitely worth it! Thanks for looking.

Tuesday, May 12, 2009

Fondant Figure Class- June 27


I will be offering a class this June teaching how to make fondant figures. I will demonstrate how to make a bride. I will also show how to make a person in regular clothes. The class registration fee is $25 and all supplies will be provided. By the end of the class you will have your own fondant figure to take home. If you are interested please contact me with your name and email address. The registration fee is due one week prior to class date.


Thanks, and hope to hear from you soon!

Thursday, May 7, 2009

Guitar Cupcakes


What a pain! My 75 little guitars took me forever but I like how they turned out. They are vanilla cupcakes with sweet cream filling and whipped buttercream.

Sunday, May 3, 2009

More Mini's


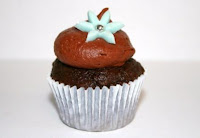
Here are some close up pics of the minis.

Mini Cupcakes


Here are the pics I promised of the mini cupcakes. I don't think I will take an order for 400 minis again any time soon. They took forever and I am glad they are all done. Thanks for looking!

Guitar Cuppie

Guitar Cuppie
I love how this turned out. I think I am in love with cupcakes!

Ghostbuster Cuppies

Ghostbuster Cuppies

Purse Cuppie

Purse Cuppie